Behind the Scenes of Our Latest Video: Part 3, Putting it All Together

Camtasia has been my tool of choice for most of the instructional videos I create, including the first therapy dog video. I began assembling this video by adding the narration track, and then I added music tracks downloaded from Storyblocks. I wanted music that was upbeat but not silly, and I went with two different ukulele tracks that matched the dogs’ energy and enthusiasm. Once the audio elements were in, I began adding video clips, starting from the first frame. Some parts of the video came together more quickly than others – we had gotten exactly the shots we wanted, and the timing of the clips worked as planned. Other segments took a little creative editing. In some cases, the shot we had envisioned didn’t exactly play out the way we had wanted, or when I put the usable footage in, it ended up not being quite long enough. Occasionally, I used different clips than I had originally planned, or slowed down the footage just enough that it wasn’t noticeable but allowed the footage to fill up the available space. 

To my surprise, this portion of the creation process went really quickly. It helped that the semester had slowed down somewhat, so I had more time to devote to the project. Additionally, editing videos of dogs is just plain fun. I had to be careful not to spend too much time editing or else I’d get motion sick, but even so, the first draft of the video was completed in about 3 weeks.  

When I had a first draft, I sent it to my colleagues for feedback. Asking for feedback on something I’ve spent so much time with is tough. However, I got some valuable feedback on some of the B-roll shots I’d incorporated, so I made those edits and sent it back to my colleagues for a second round. This time, Kayla pointed out something that I had grown so used to that I barely noticed it: shaky video. In a lot of cases, the camera had been hand-held without a stabilizer, so some of the clips were fairly shaky. 

I experimented with a couple different ways to stabilize the video. I first tried stabilizing in Premiere, but I wasn’t satisfied with the results. I ended up using iMovie and stabilizing just enough to smooth things out but not end up with a weirdly-composed shot. This editing ended up taking several hours over a couple of days as I exported portions of the draft video from my desktop, stabilized them in iMovie on my laptop, and brought them back into the project file in Camtasia on my desktop. When it was finished, however, I was really pleased with the results and could see the difference between the final version and the previous drafts. 

Once the video was stabilized and my colleagues had approved the final draft, I added it and the trailer video to YouTube, and then captioned the full video using the script. This approach makes captioning quick and easy, and the YouTube interface is fairly easy to navigate. I also added both videos to the Odyssey channel of Virginia Tech’s Kaltura interface and captioned them by exporting the caption files from YouTube and uploading those to the Kaltura video. Finally, I added the video to Odyssey, our learning object repository.

Celebrating the project’s completion 

With the videos ready for viewing, our library social media manager scheduled Facebook, Instagram, and Twitter posts featuring the videos, with the trailer posted a week before the full video. Because so often we complete video projects and then turn directly to the next without celebrating the completed project, we planned a quick premiere party for the day before the video would be shared on social media. We reserved one of the library classrooms, got both human and dog snacks, and invited all studio staff and those who had been involved in filming, including Trent and the therapy dogs. It was really exciting to share the videos with everyone and have a chance to pause and appreciate the effort that had gone into the project. My colleagues also gifted me with a 3D-printed Moose, which now has a prominent place on my desk. 
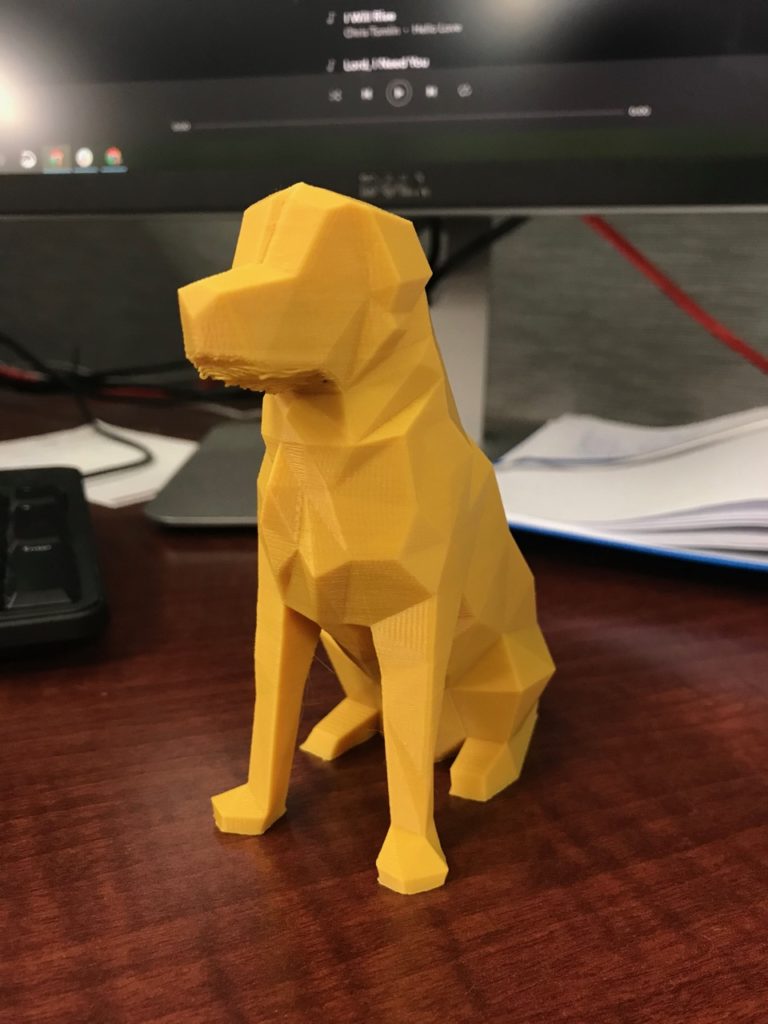
A yellow 3D printed dog on a desk
A 3D printed Moose for my desk

The entire project (about 4 minutes and 30 seconds of video) ended up taking about 45 hours of work, spread out from June to October. If I’ve done my math correctly, that works out to about 10 minutes of work per 1 second of finished video. I’d say that each of those minutes of work was worth it. 
Behind the Scenes of Our Latest Video: Part 2

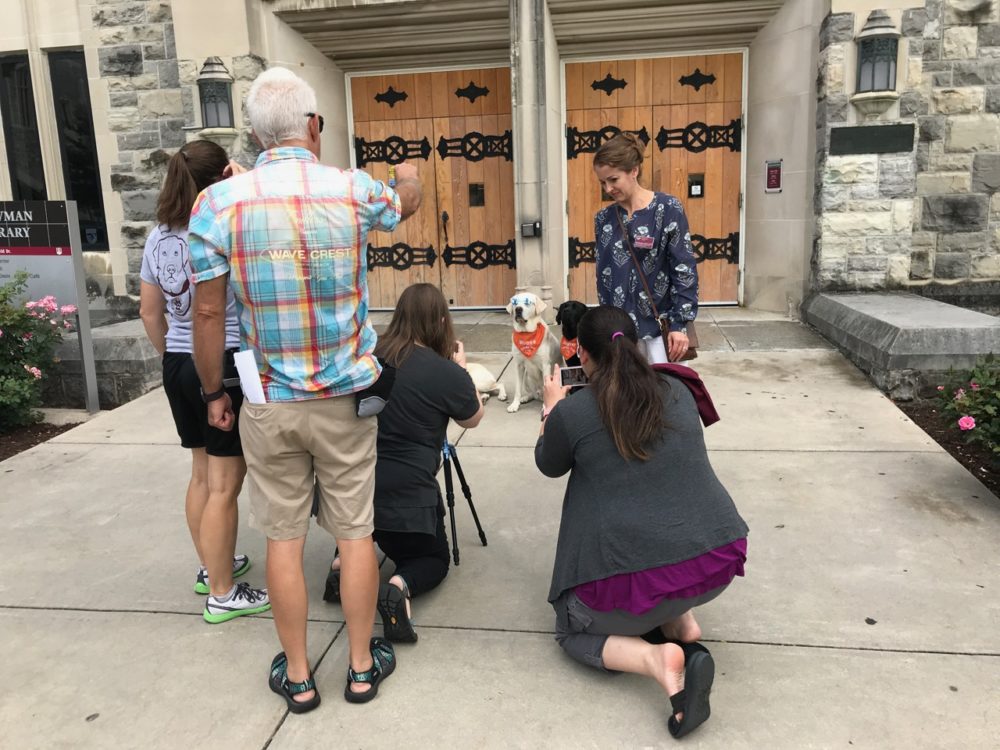
A group of people taking photos of dogs in front of a library

My excitement grew as the filming date approached. Having worked on the video with Moose the previous summer, I knew that filming would be both challenging and fun. The dogs are all incredibly well behaved, but they’re still dogs, after all. On a warm August day, all three dogs, along with three human handlers, arrived at the library to film. All of the dogs have been highly trained, either as a seeing eye dog (Moose and Derek, who were both released as seeing eye dogs due to minor medical problems) or as a PTSD support animal (Wagner), so they follow commands well and are very treat-motivated. 

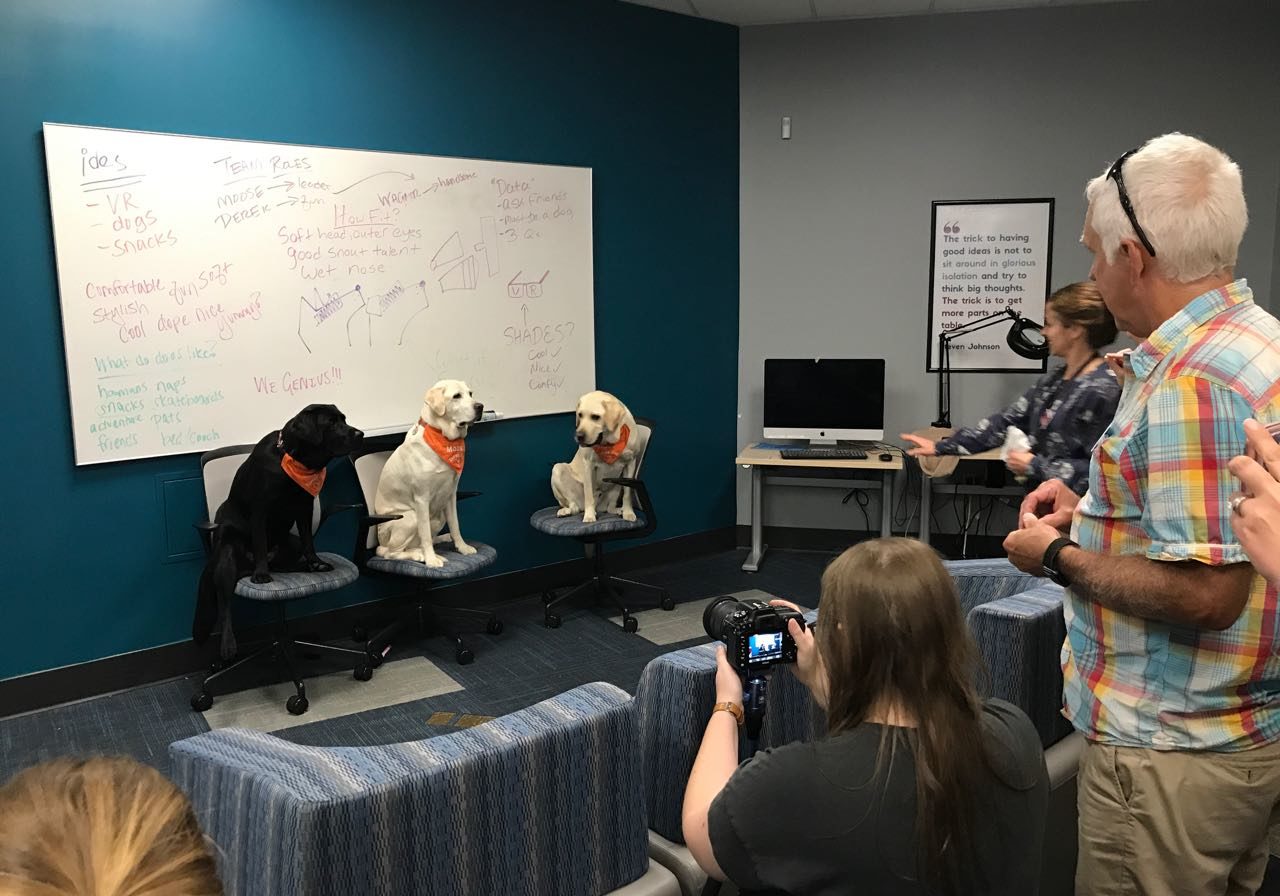
Many of the shots that we wanted to get were pretty basic: dogs sitting in chairs, dogs walking down a hallway, dogs “talking” with a studio employee. Cut together with voiceover and bright music, these simple shots add up to a fun video. Overall, getting all of these shots, in locations all across the library, took about 3 hours, with a break in the middle. The sight of three dogs in the library drew a lot of attention, so the dogs also got to hang out with patrons when we weren’t filming. 

To film the content, we used library-owned equipment. Since the only sound on the video would be the music and narration, we didn’t have to worry about recording audio while filming, which made things a lot easier. We also set up a Go-Pro in each location while we were filming in order to capture any fun moments that might occur. The best one was when Kelsey used the Go-Pro to try to get a close-up of Moose getting a treat and he accidentally knocked the camera out of her hand – look for it as the final shot of the video.

Editing

Once filming was complete, I wasn’t able to do too much work with the video at first because the fall semester started the following week. One thing I did do was put together a quick thank-you video to share with everyone who had worked on it. With a few edits later, it eventually became the video’s trailer:

Before I could create the final video, I first had to look through all of the footage and identify the usable portions of each clip. Kelsey and I had decided in advance to err on the side of keeping the camera rolling as much as possible to make sure we captured the maximum amount of footage, whether or not it was what we were going for. My first step was to watch each clip, rename the file so that we’d know what it contained, and note the points in the video which had the content we needed. This portion ended up taking a lot longer than I’d anticipated, and it was complicated by the fact that I began to get eyestrain and motion sickness from watching HD video on my HD monitor for more than about 15-20 minutes at a time. I ended up switching one of my monitors to a much lower resolution and making the window in which I watched the videos quite small. This problem with motion sickness would end up being a challenge throughout the entire editing process. 

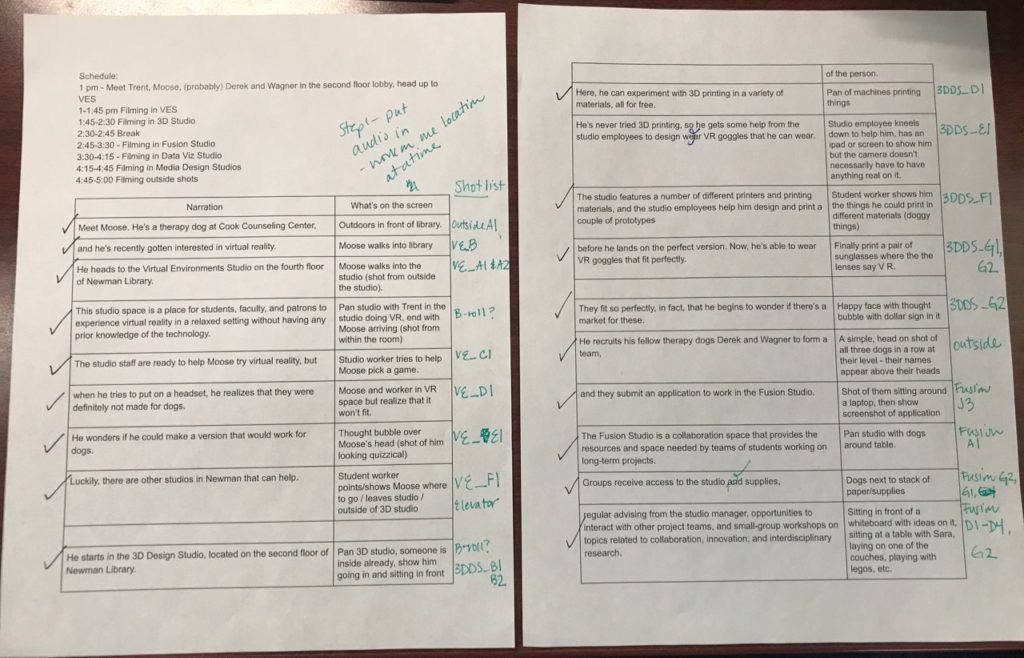
This process of watching the clips and identifying the usable portions ended up taking over a month, as I worked on it in snatches of time throughout the day. When I was finished, I took the storyboard and filled in the file names of the clips.

My planning document

Kelsey had gone to each location and shot B-roll of the studio interiors and exteriors, so I incorporated those into my planning as well. I’d had one of my colleagues record the narration, so once I was finished mapping the clips to the storyboard, I began assembling the video. 

Coming soon – part 3, putting it all together. 

Behind the Scenes of Our Latest Video

Three dogs sitting on chairs in front of a whiteboard while someone films them

Since there’s a lot of unseen work behind even a short video, I wanted to take a chance here to tell the story behind one of my team’s newest learning objects, “Create and Collaborate at Newman Library,” which stars…therapy dogs.

Partnership with Counseling Center

I’ve been a huge fan of the work done by the counseling center’s therapy dogs (scroll down to the bottom of the page for their staff bios) and their human, Dr. Trent Davis, ever since I first met Moose and Trent at a first-year orientation fair a few years ago. The content production team’s current partnership with the therapy dogs began in summer 2018. I wanted to create a video about reading Library of Congress call numbers and checking out a book, but I needed some way to make the video interesting. When I first thought of including Moose the therapy dog (the only campus therapy dog at the time), it seemed like a partnership that would not only benefit us, but also help more people learn about Moose and the work that he does. Trent was excited to partner with us, and the result was “How to Find and Check Out a Book” (VT-specific) and “Using a Call Number to Find a Book” (non-VT-specific). 

When I saw Trent, Moose, and Derek (newly added to the therapy dog team) at an exam event in the library in fall 2018, Trent said they’d love to do another video sometime. My mind instantly started running through the possibilities, and after talking with others in the library, we decided that a promotional video about our library studios would be nice to have. 

Scripting and Storyboarding

The challenge with a video that, technically, you don’t have to make (no one from the studios had asked us to make a promotional video, though they were really excited that we were), is that it can be difficult to find the time to work on it. We tend to make more learning objects during the times when we aren’t as busy with instruction, typically the summer and the tail ends of the fall and spring semesters. This video sat on the back burner for a couple of months after we decided to make it, but in June, we were able to start working on it. The first step was scripting and storyboarding. My supervisor, Kayla, was managing one of the studios at the time, so she brought the idea to the other studio heads, and they brainstormed potential ideas that would allow the story to include each of the studios. The strongest idea that emerged was that Moose would be on a quest to experience virtual reality, but since he couldn’t wear a typical headset, he’d have to design his own. That quest would take him through each of the studios and could involve all of the therapy dogs (up to three at that point!). 

With the idea in hand, I started working on the script, beginning by watching the previous Moose video and thinking about what made it appealing: a simple narrative, dogs doing human things, dogs doing dog things, goofy moments, bouncy music, and real information being conveyed. After I had a draft script, I sent it to the studio heads for feedback and edited it based on their suggestions. For each studio that the dogs visited, a pattern emerged: move the narrative forward, explain what students can do in the studio, and get the dogs to the next studio. 

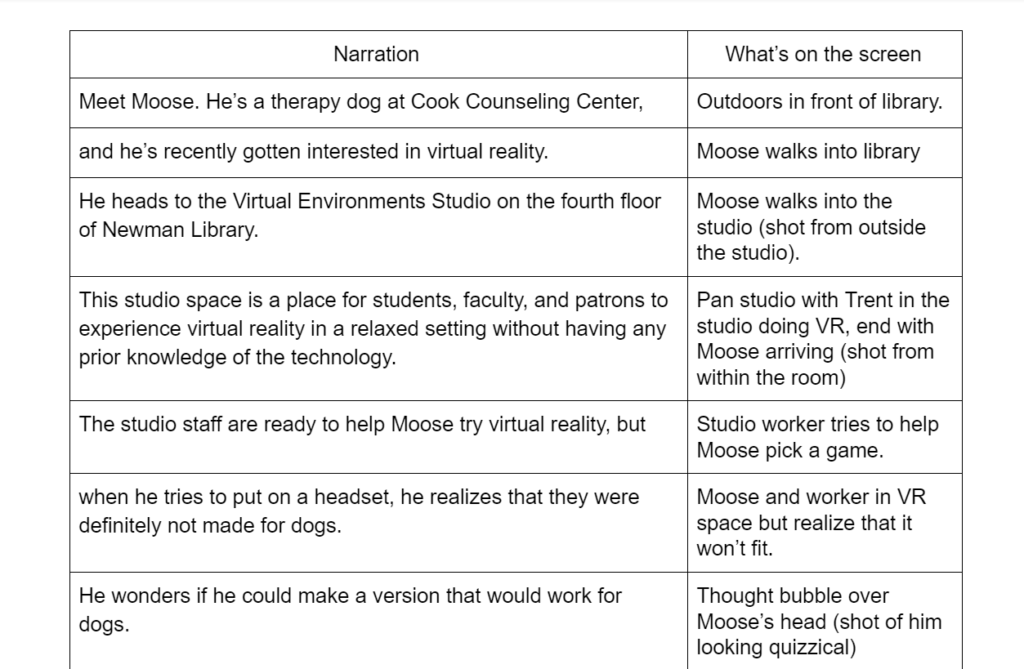
Once we had a script, it was time to storyboard. For that, I brought in my coworker Kelsey, who would be doing the actual filming. We used our standard storyboard format, which breaks down the script into pieces according to what we expect to see on the screen: 

The beginning of the script/storyboard

We also created several lists: things we needed for the filming that day, props we needed to procure, and a detailed shot list of the visuals we definitely wanted to capture. Once we’d confirmed a date and time with the dogs and their humans, we also created a detailed filming schedule by location. Since we were dealing with six locations and extras for each location, the scheduling portion was challenging. We were squeezing in filming the last week before classes started, which meant that many student workers would be there to be in the video, but it also meant that the library was a bit busier than it had been for most of the summer. 

Coming soon…part 2, covering filming and editing! 

Fighting Post-Workshop Inaction: An Action Plan

My experience after conferences and professional development workshops usually follows a similar pattern – at the conference, I’m really excited about all of the new ideas that I’ve encountered. I have grand plans of how I’m going to transform my teaching, my work, or hey, even my life, and everything seems possible. But sometime in the after, the enthusiasm dies and I get overwhelmed by the day to day, and the grand plans are forgotten. I may make a few changes, but there’s no real transformation.

But I want to break that pattern with the Digital Pedagogy Lab Institute. The things that I’ve learned here aren’t just new and shiny ways to snazz up my instruction; they have the potential to fundamentally transform my mindset, my work, and my approach to teaching – if I let them. So here’s my action plan, my plan to break my past patterns of post-workshop inaction.

While there are so many things that I’m mulling over, here some of the big picture ideas that I’ve taken away from this experience:

  • Bringing change to my institution and teaching starts with me. The wheels of academic bureaucracy turn slowly, and my teaching is constrained by a variety of factors. But I am the common factor in both of those situations, and I can change myself, my mindset, and my practices. [overall]
  • I have to ask questions – for whom and for what am I designing? Perhaps even more deeply, why? And I have to keep asking. [from Design track]
  • How can I support the whole student, especially those who are struggling to meet their basic needs? [Sara Goldrick-Rab’s keynote]
  • We have to embrace the complexities of the critical approach to instructional design (the not-yetness). The approach troubles the relationship between designers (in my case, librarians) and the partners with whom they work, but it’s a mess worth making. [from Design track]
  • Very little is off-limits in the critical instructional design world – student privacy, the past, the future, the learning management system, the syllabus, my design principles, the ways we unintentionally or intentionally oppress our students, our partnerships and collaborations, current local and national politics and the politics of our institutions. [overall]

So what next? I’ll go back to work next week and immediately get pulled into so many things that will demand my attention, and I’m feeling somewhat reluctant to leave the Digital Pedagogy Lab Institute and the space that it’s provided me to think about these big questions. At the same time, I’m excited about the fact that I have a place where I can put the big ideas into practice.

I said above that bringing change starts with me, so that’s where my action plan begins. I was captivated by the idea of first identifying my design principles and then questioning them all the time, and I want to start there. I know that if I look at the things and learning experiences I’ve designed, I will see my implicit design principles, and I know that these may not be what I want them to be. From there, I will think about the kind of teacher, librarian, and designer I want to be, how that translates into my design principles, and how I can reconcile my implicit and explicit principles.

I also appreciated Sara Goldrick-Rab’s concrete advice about how we can support students struggling with their basic needs, and I plan to research what’s available for students on my campus and in my community and create a resource guide to make available to students. I also plan to add language to the syllabus for my class to support students who need help meeting their basic needs.

Additionally, I need to self-educate. I have a hefty reading list already (thanks, design track!), but if I don’t make time to actually read, those items will just be added to the long row of shoulda-coulda-wouldas on my mental bookshelf. I plan to read Sara Goldrick-Rab’s book and explore the contents of Hybrid Pedagogy for starters, and from there I will develop a plan to explore other recommendations.

The semester starts at Virginia Tech just a little over two weeks from the time I’m writing this. I have several opportunities to take a critical approach to my teaching: the online class I teach, the one-shot instruction sessions that are already scheduled, and the graduate student orientation sessions that I’m coordinating. Each situation will be different, but in all of them, I can ask the important questions: why am I teaching in this way? Why am I using this technology? Am I letting the technology come first and dictate my pedagogy? Am I finding ways to encourage students’ agency? This will be hard. The fall semester is always busy, so I’ll have to find ways to remind myself to ask these questions.

While the only person I have complete control over is myself, I do coordinate a team of instructional designers and librarians, two of whom also came to the Institute, but several who did not. We’re all under a lot of pressure as we launch some new initiatives and services this semester, and it would be easy to just forget some of this more cerebral stuff. But I think that these pressures make it even more important to ask these questions of ourselves and of our teaching. So I plan to walk my team through the process of thinking through their own design principles as well as the principles and values we have as a team. In all the clutter of our day-to-day work, I don’t want our aspirations to get lost.

Finally, I don’t want to lose the connections that I’ve made here. I’m fortunate that three of my colleagues are here as well, and I’ve also made some great connections. I’ve already scheduled some time with my colleagues to debrief from this week, and I plan to stay engaged in the larger community of the Digital Pedagogy Lab.

It’s hard to gauge the impact of a experience when you’re still having that experience, so I can’t yet say for certain exactly how my teaching and mindset will be different in the coming weeks and months. But here at the close of this week, I’m feeling optimistic. And in a world that seems to be coming unglued, a little optimism can go a long way.